PowerOn Pipelines brings managed releases and version control to Symitar, the Jack Henry™ credit union core platform by way of an Azure DevOps pipeline tasks.
This quickstart is designed to help you configure your Symitar repository in Azure DevOps and use either ValidatePowerOn or SynchronizeDirectory tasks to manage the full software development lifecycle of your Symitar environment.
In this quickstart, you will learn:
- A brief overview of basic concepts of Azure DevOps + PowerOn Pipelines
- The prerequisites that are required in order for you to get started
- Where the links are to the resources to help you define how your pipelines should look for your organization
If you run into any challenges or have questions about getting started, please join Libum Community on Discord.
Getting started
Creating your Symitar repository
You'll need a repository to reference all of the Symitar core which you care to control (e.g. PowerOn files, DataFiles, LetterFiles, HelpFiles). To provision a new git repository you can follow Microsoft's guidance here.
Once you have the empty repository, you'll need to populate it with one or many of the directory in Symitar. The easiest way to do this is likely through using the Clone Sym Directory command in the Visual Studio Code Extension, PowerOn Pro. Once you get done, your repo may look something like this:
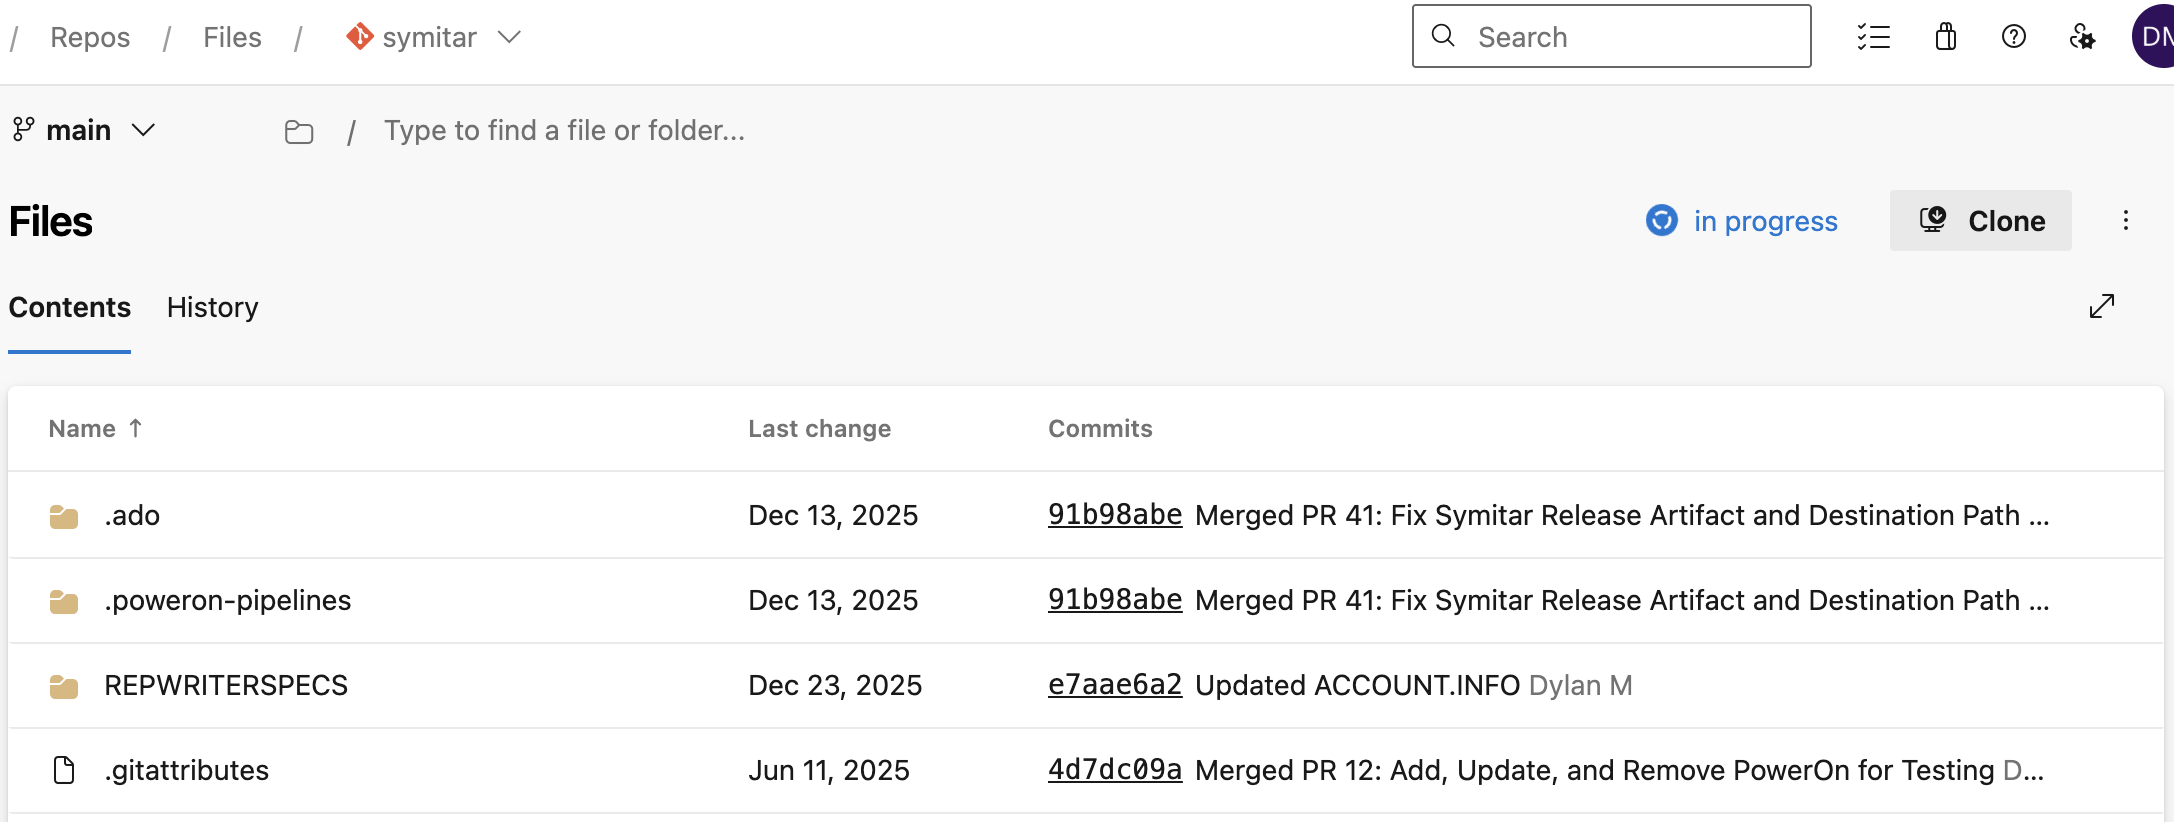
A few quick notes on the additional .ado and .poweron-pipelines directories and the .gitattributes file included in the screenshot:
.ado
The folder will house the pipelines you'll create to manage the execution of the tasks through YAML configs. See Examples if you want to skip ahead to what the pipelines look like.
.poweron-pipelines
This folder will contain the PowerOn Pipelines configuration file (e.g. config.yml) which follows the Configuration page.
.gitattributes
This file should contain the following content as cross-platform development on Windows OS can sometimes be complicated since the default line endings is CRLF when Symitar requires LF.
# Normalize PowerOn files to LF line endings
REPWRITERSPECS/* text eol=lf
Create an Agent Pool and Agent for Task execution
In order to physically run the pipelines, you'll need a self-hosted agent (since we require network access to Symitar). If you have a multi-purpose OpCon Agent or something of the like, that would do fine. The compute load on the machine for these tasks is not extensive at all.
We encourage you to follow Microsoft's guidance to provision a self-hosted agent, here. Just keep in mind the preference is to have it run as a service so you don't have to worry about keeping it online in a terminal. Also, any agent OS is fine too, we at Libum actually exclusively run Linux but have to make sure Windows works from time to time 
Configuring PowerOn Pipelines
To manage information to the PowerOn Pipelines tasks, we provide a generalized config your organization can provision for things which should apply to every task.
Setting up a PowerOn Pipelines configuration file
This file just needs to exist at .poweron-pipelines/config.yml within your repository and may look like something like the following:
# Default inputs that apply to all tasks
inputs:
  powerOnsDirectory: REPWRITERSPECS/

# Map of branch / symNumber relationships
branchSymNumbers:
  main: 627
  stage: 627

# List of PowerOn files to install
installPowerOns:
  - LB.VALID.PO

# List of PowerOn files to ignore during validation
validateIgnorePowerOns:
  - ASCIICHAR.DATA
  - RB.SYNERGY.AP.INDEX.ASCIIDATA

# Files generated or managed by Symitar that should be preserved from the server
preserveServerFiles:
  - RD.*
  - PFR.*
In this file, we're setting a default value for the powerOnsDirectory input across all tasks, mapping branchSymNumbers to their respective Sym Numbers, explicitly stating which PowerOns (if changed / added) need to be installed through installPowerOns, stating which should be ignored for validation via validateIgnorePowerOns, and preserving server-managed files through preserveServerFiles.
For more details or context into how the PowerOn Pipelines config file works, visit our Configuration page.
Creating a Pipelines Variable groups
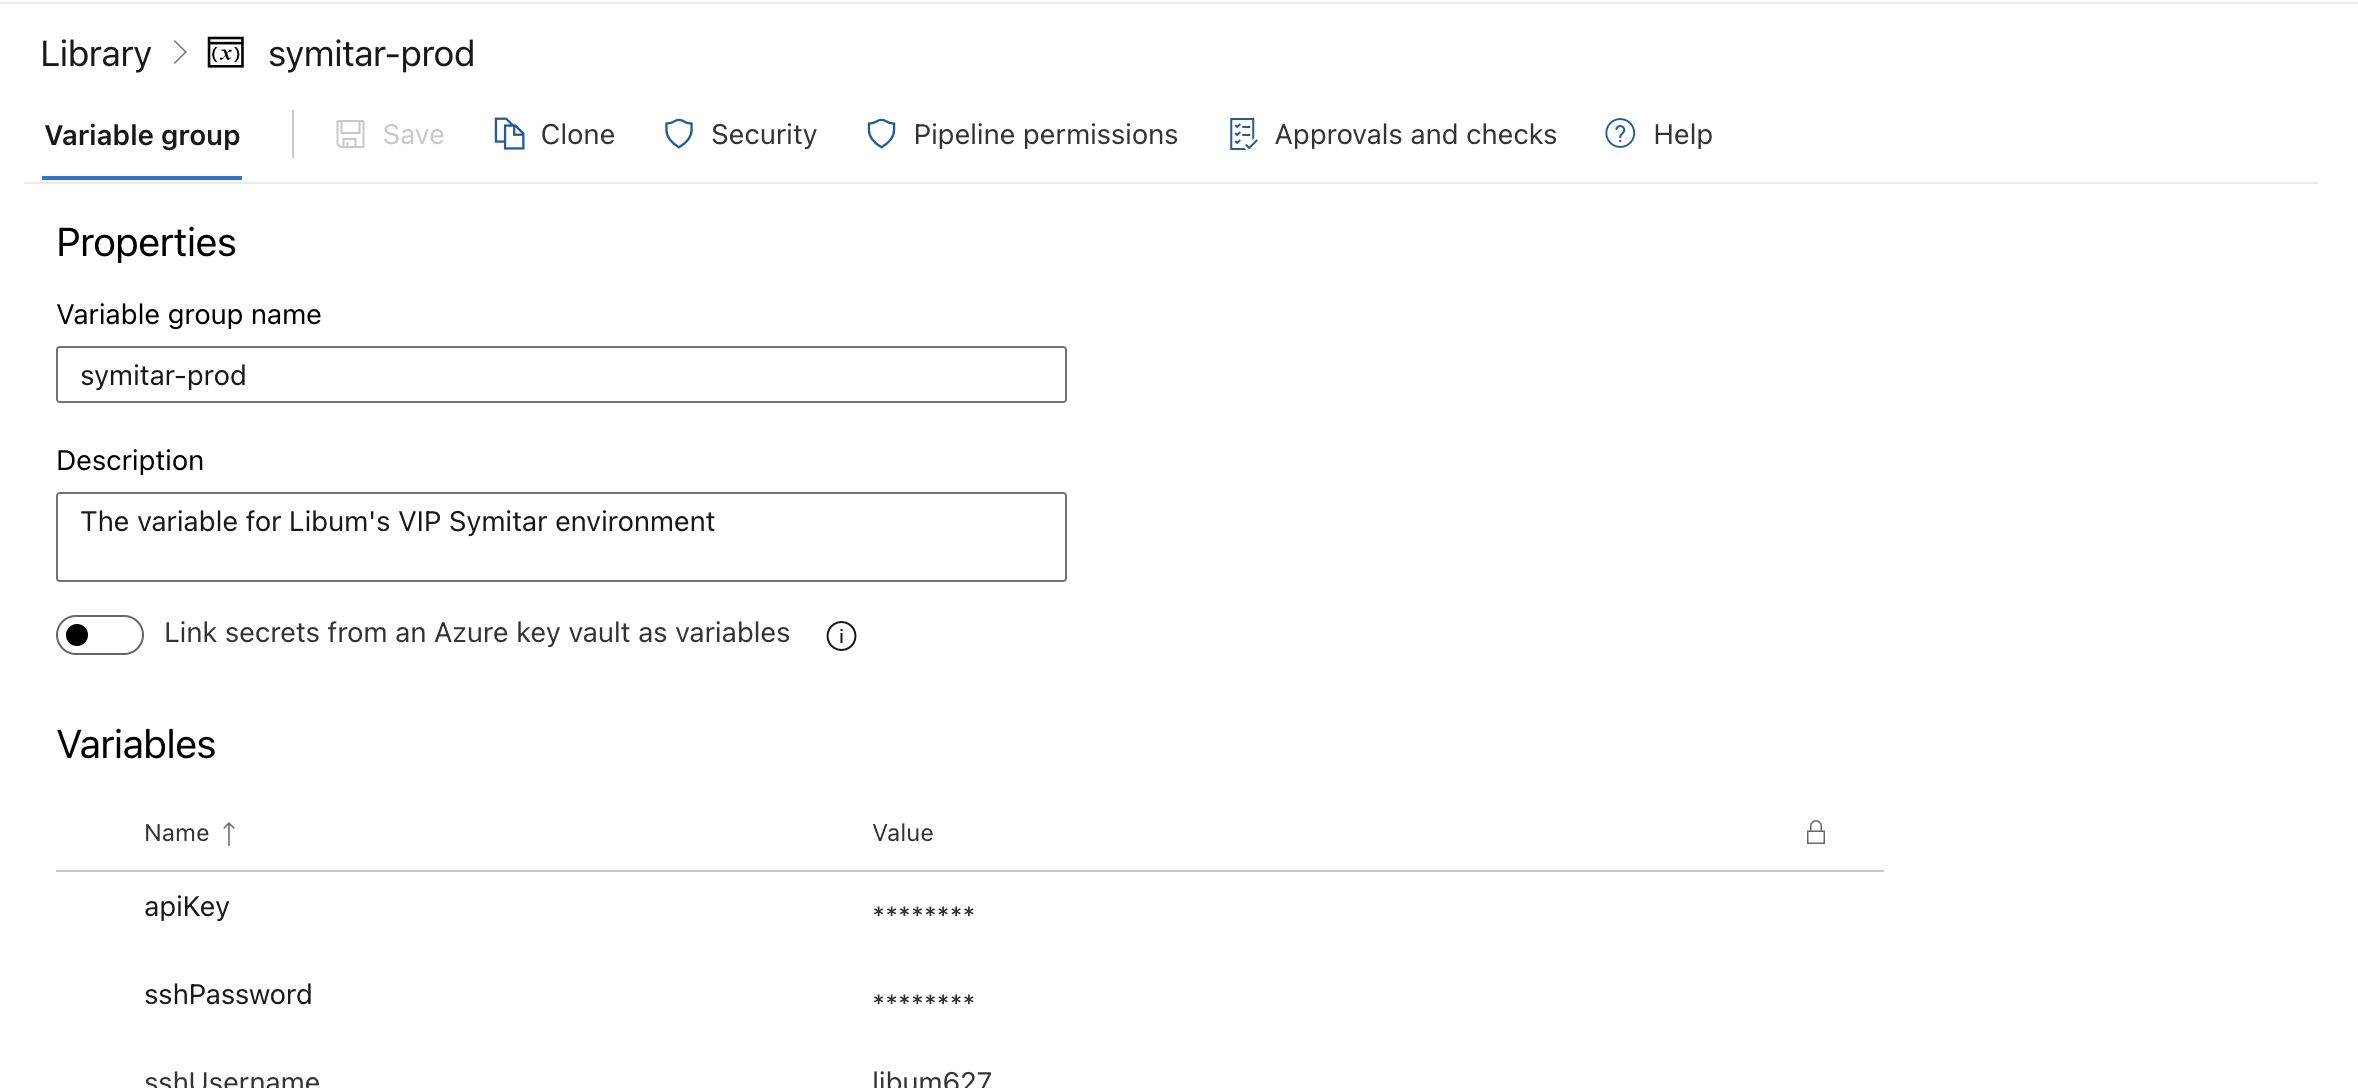
These are required for us to be able to pass over both dynamic and secret information to the PowerOn Pipelines tasks. You can access your variable groups through the GUI via Pipelines > Library > Variable groups.
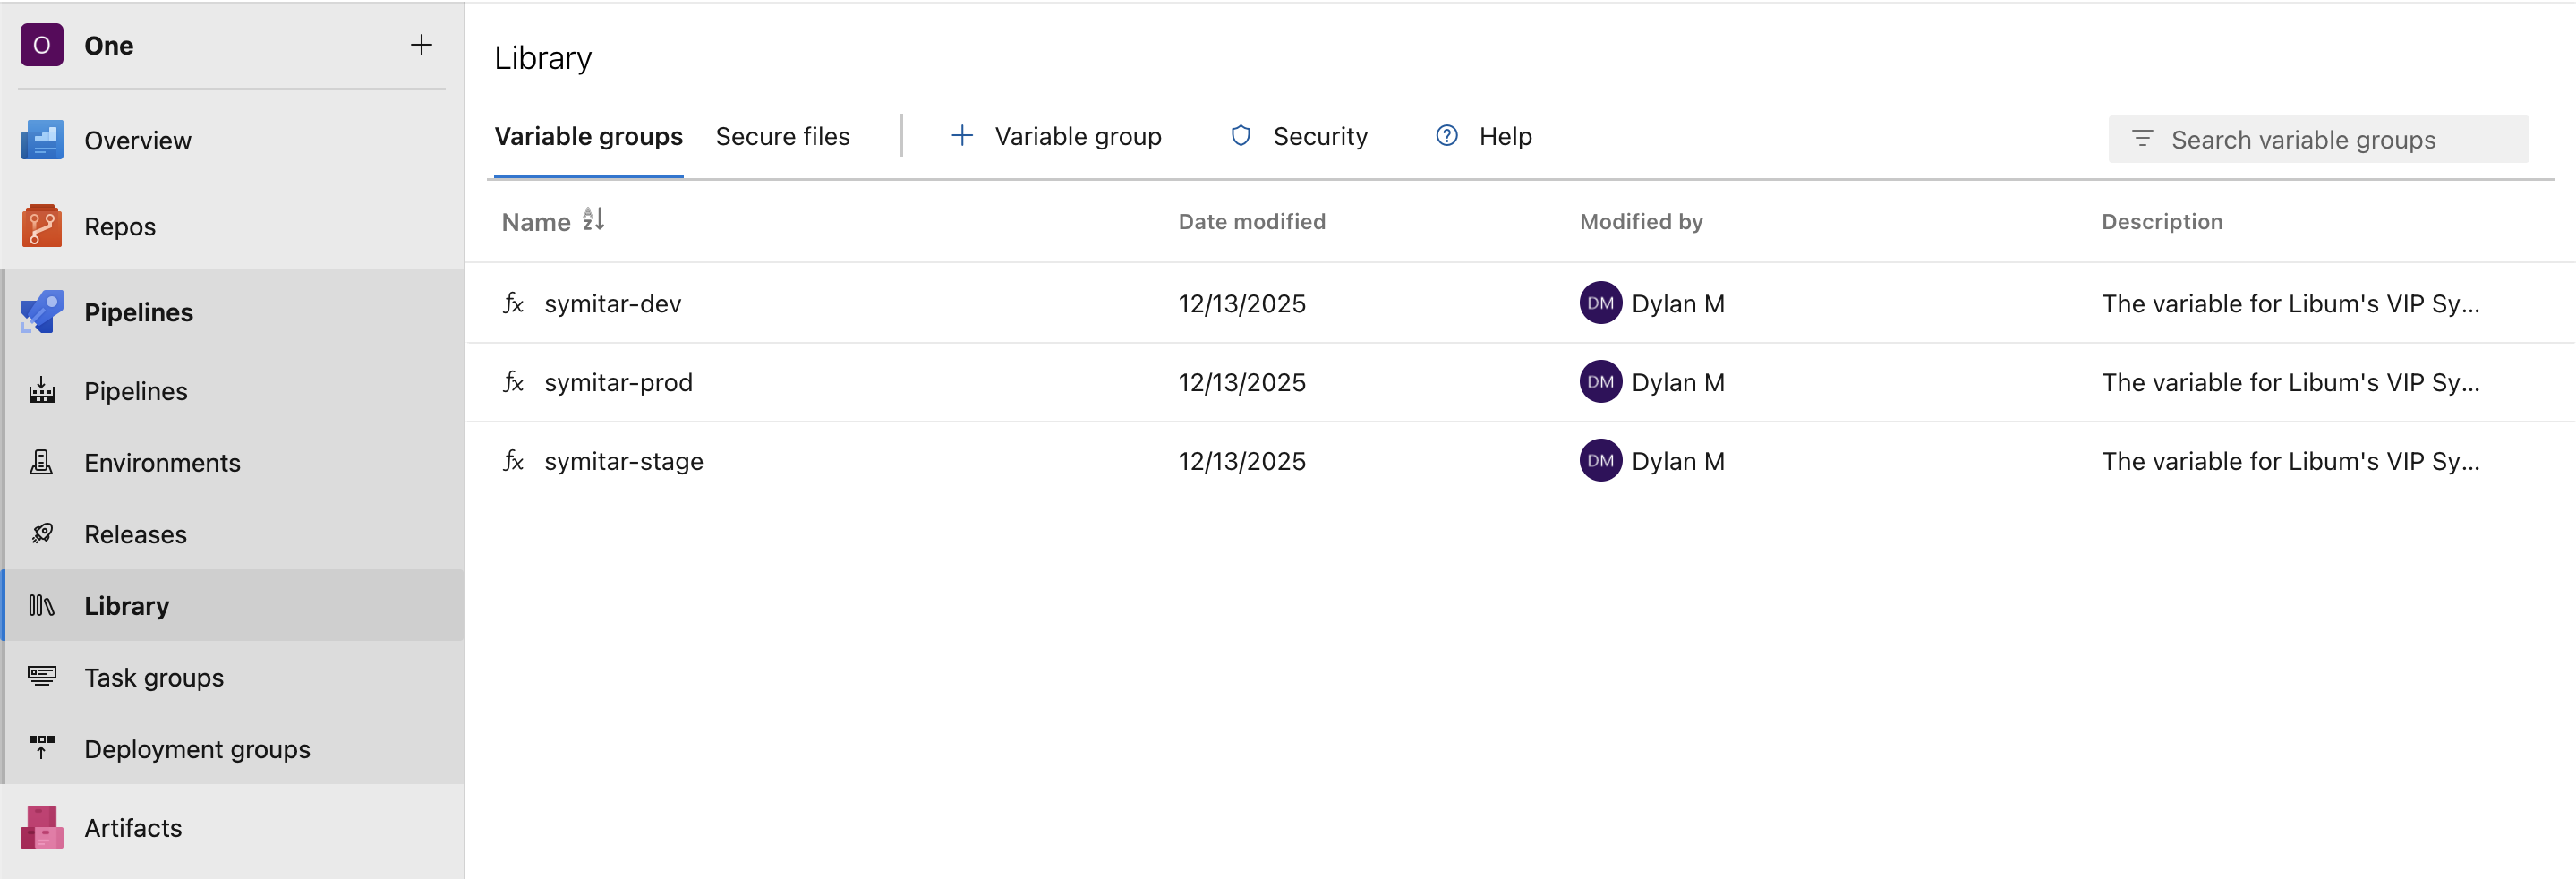
From here, it may seem pretty intuitive. We just created three distinct variable groups to hold specific credentials for each of those environments. In general you should have separate credentials between your environments & you would specify them there.
Creating pipelines
To start, we've created an Examples page which includes the raw YAML files for each of the pipelines we recommend & a general overview of what they do. For creating these pipelines, you can follow Microsoft's guidance, here.
Development Lifecycle
User wants to contribute changes
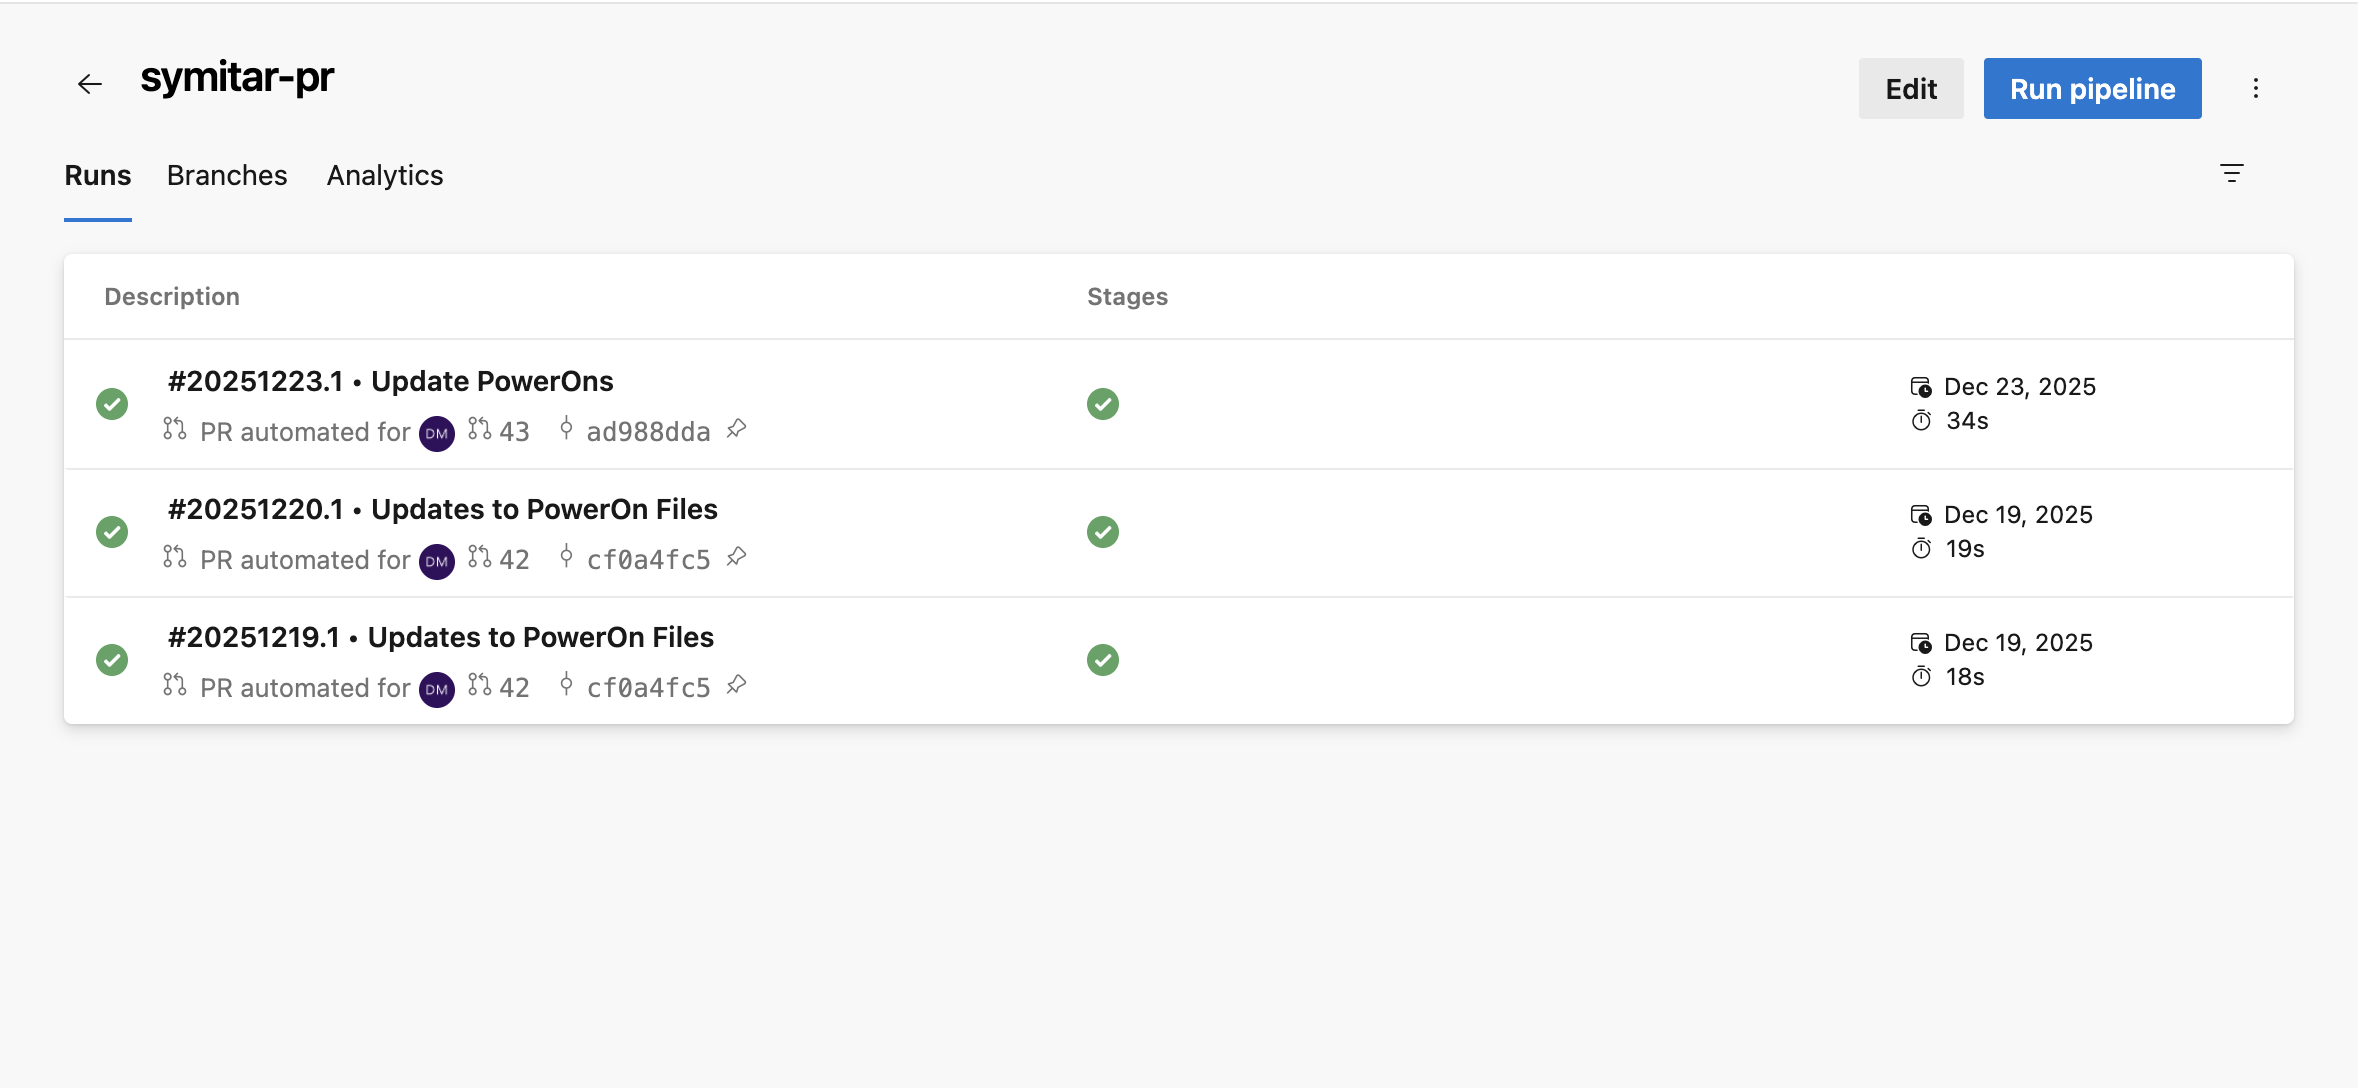
They create a feature branch, submit these changes to be merged to the default branch via a Pull Request. This Pull Request has a Branch Policy that invokes a Merge Validation process which executes the pr-pipeline.yml pipeline which detects the changes & validates any updated/added PowerOn code.
Assuming you've created a pipeline called symitar-pr which uses the pr-pipeline.yml the run history would look something like this in Azure DevOps:
Changes get checked in
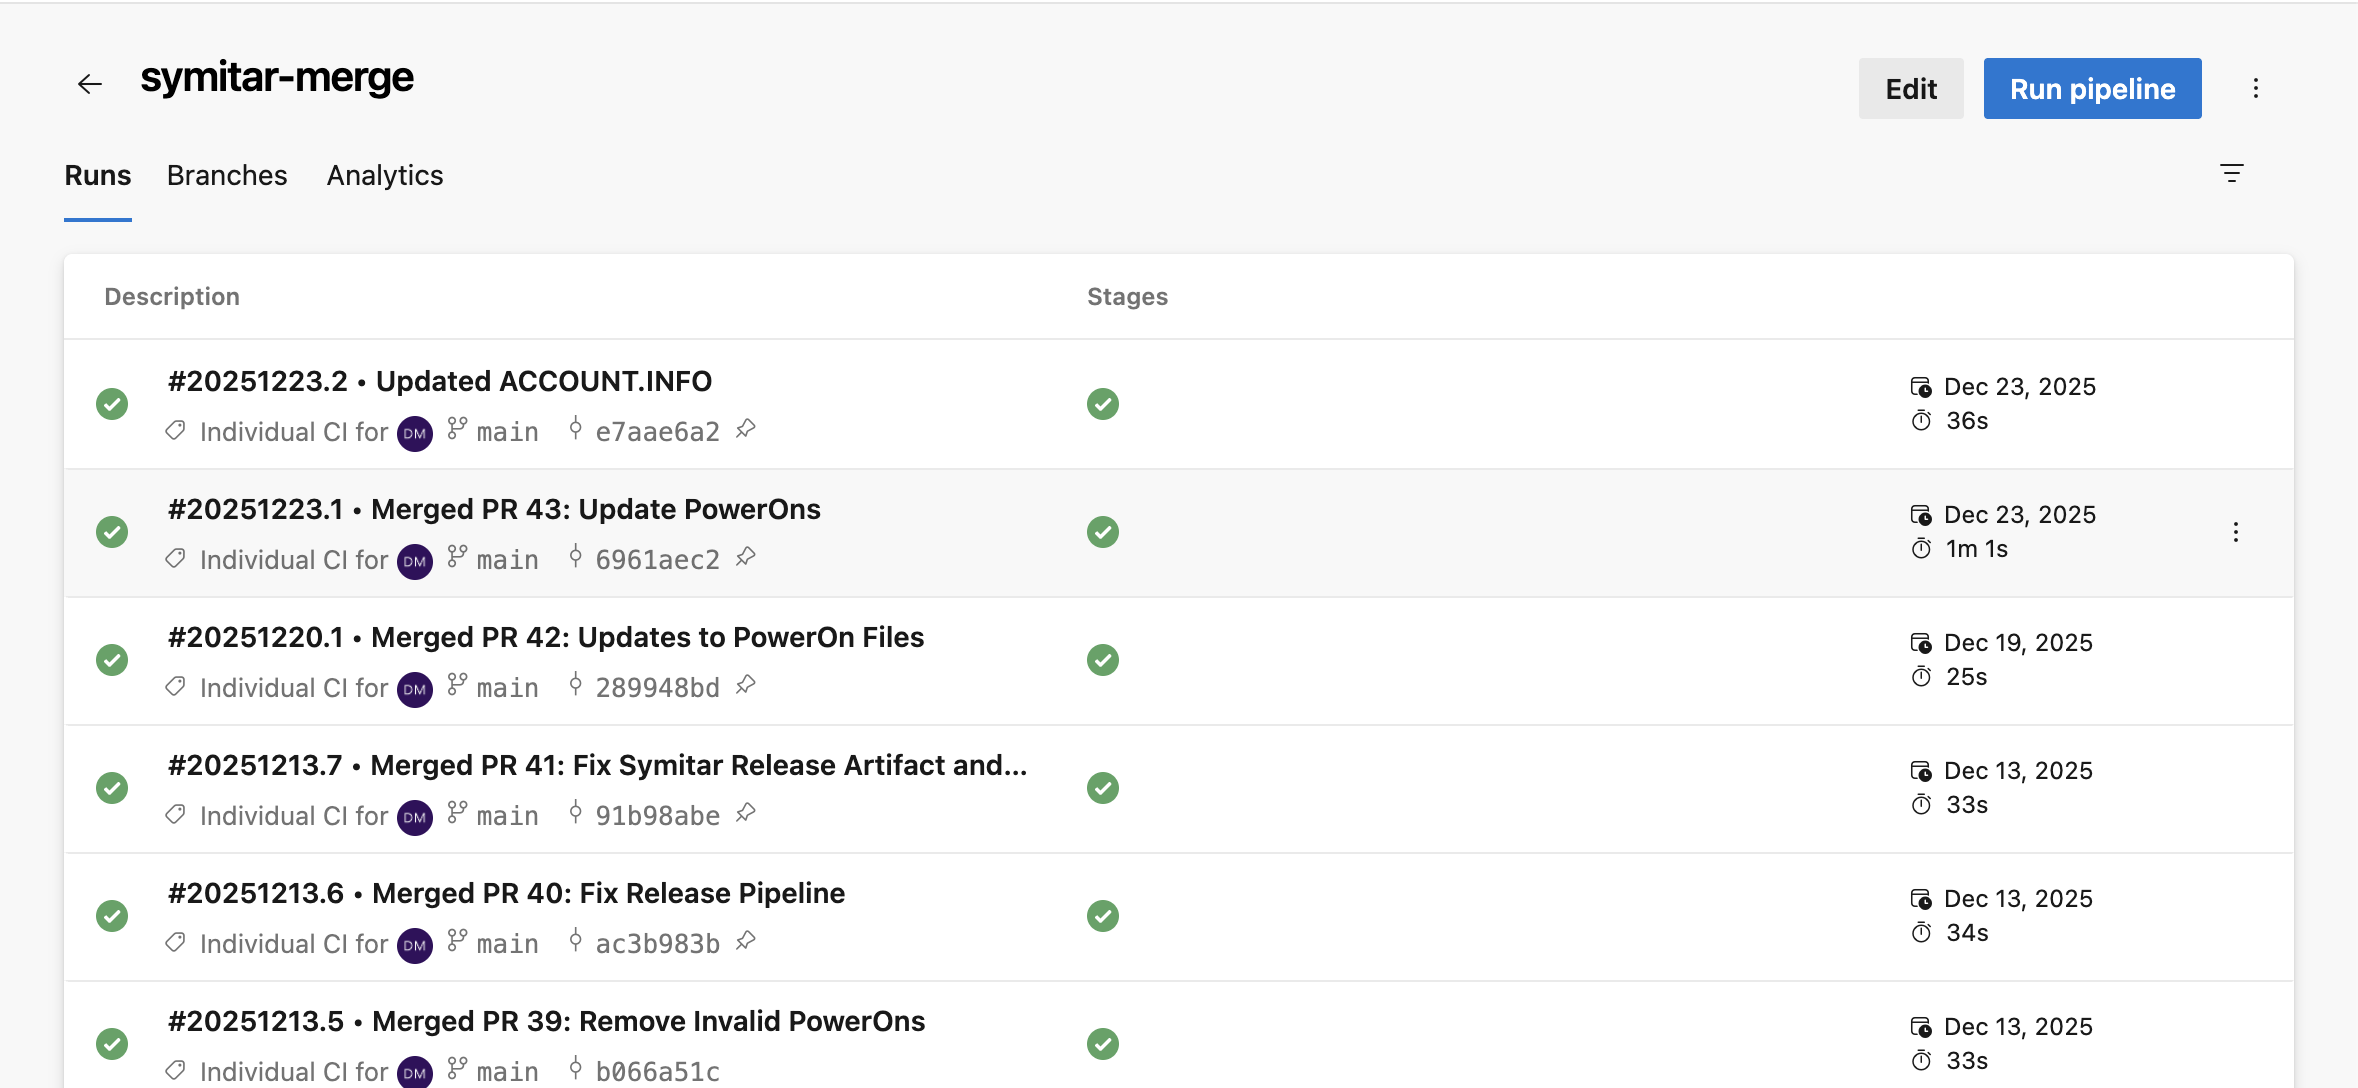
This will automatically trigger the merge-pipeline.yml which will again detect changes relative to the current state of the target branch. We validate any altered PowerOn files and produce an artifact which is a "point in time" of the repository that we can use during the release process.
Assuming you've created a pipeline called symitar-merge which uses the merge-pipeline.yml the run history would look something like this in Azure DevOps.
A release is ready to get deployed
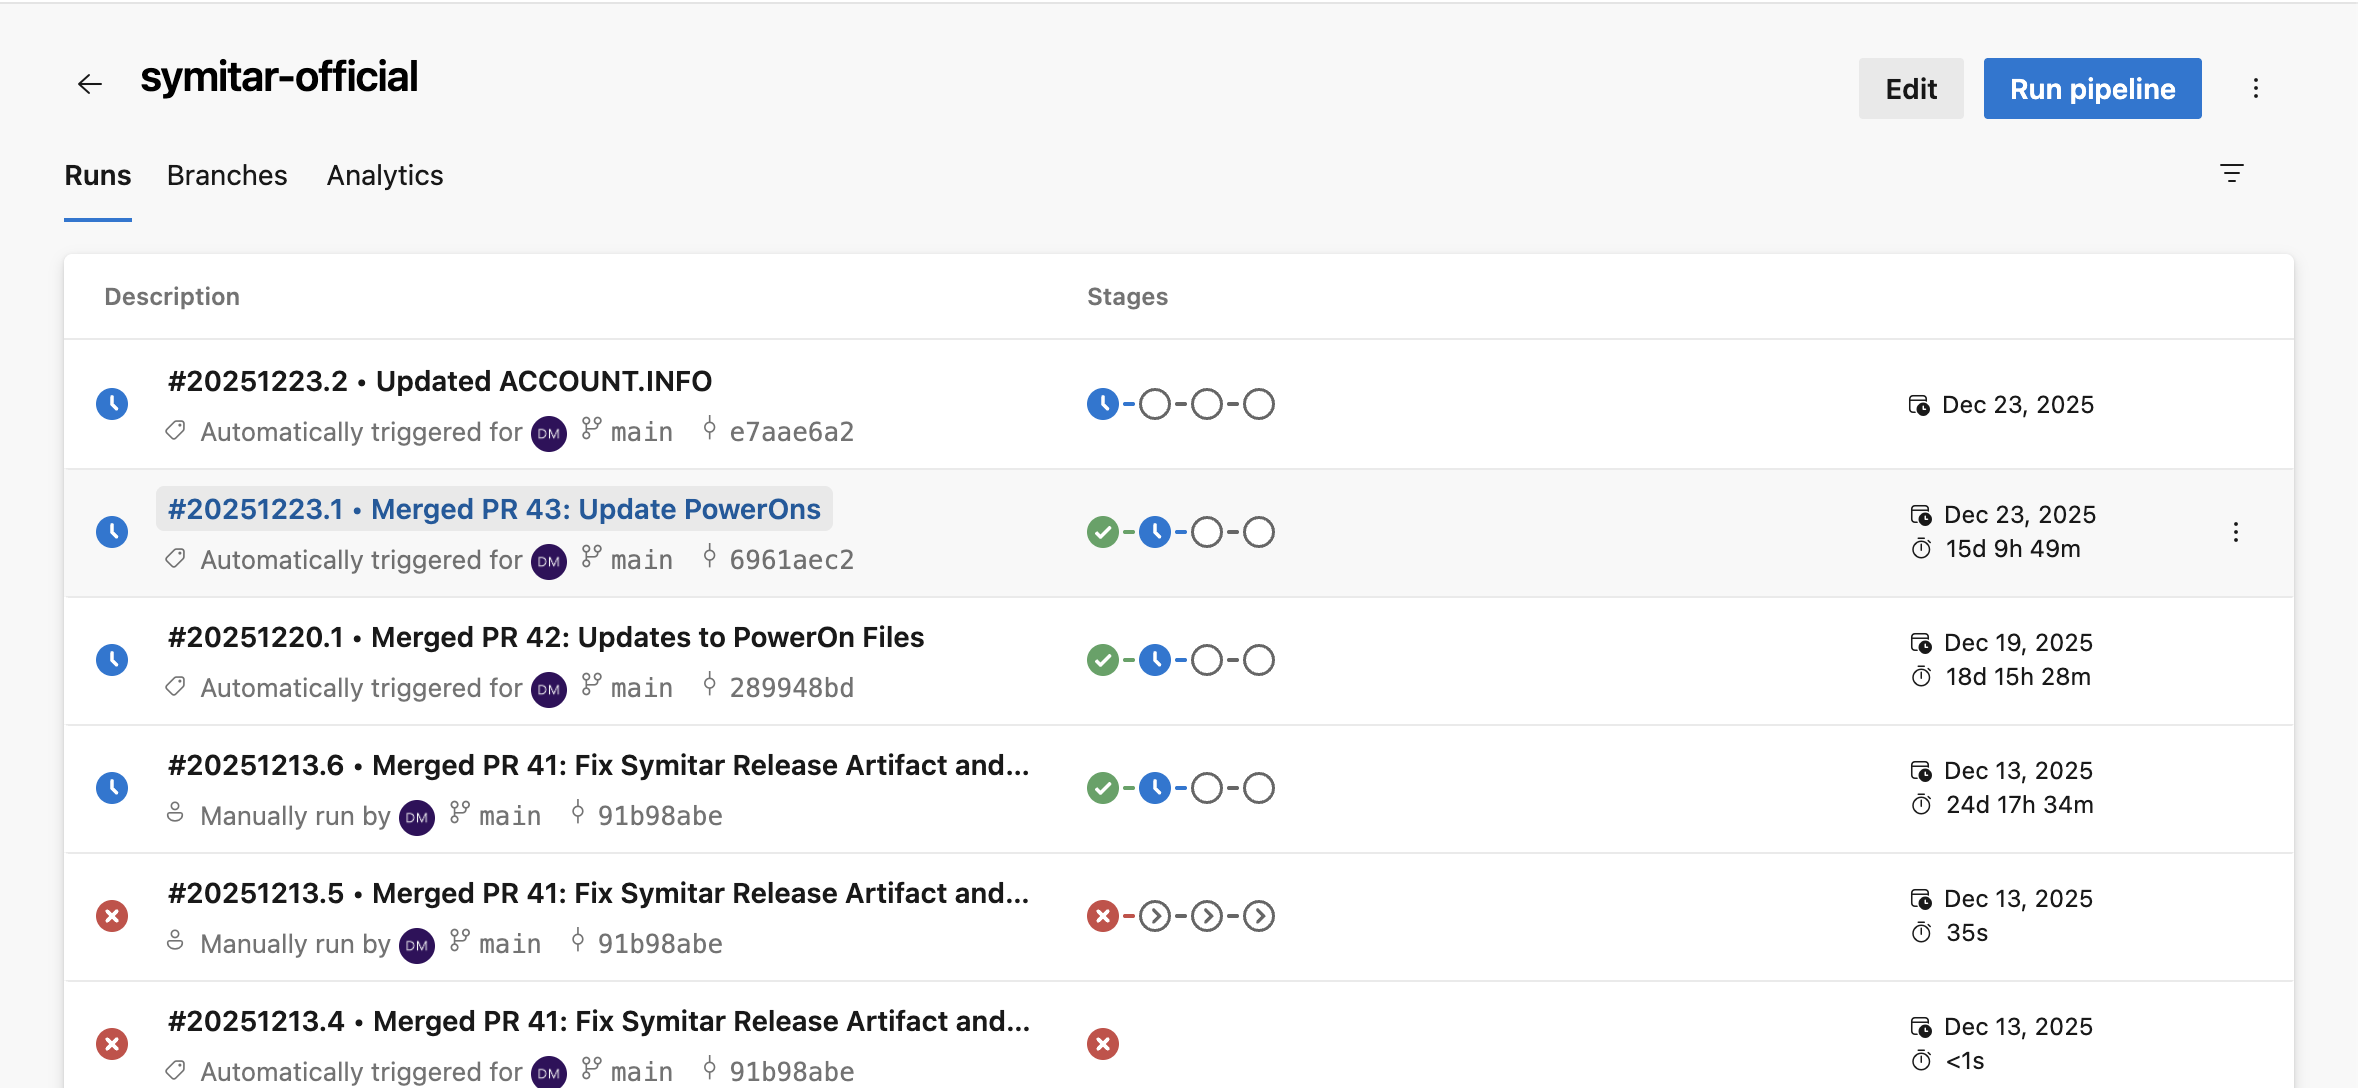
On every successful run of symitar-merge, based on the release-pipeline.yml, a new symitar-official run will trigger giving you the autonomy to select at will which release you'd like to push to any defined stage.
Depending on your organization's release cadence, it may include one or many changes. This is the reason we have a Validation stage prior which runs the synchronization task with isDryRun set to true so the prescribed changes can be validated by a particular user/group.